Menu Tools
 |
In this menu, users can create and export dataset images or videos (Recorder); modify the display layout of certain elements in the MorphoNet viewer window, (Rendering); display customizable 3D axes (Figure axis) and manage the display of dataset properties (Figure properties). To unfold each of the above submenus, press "sow". |
|---|---|
| Users can modify the view and lighting settings for the viewer. |
Recorder 
 |
Create a new movie of dataset. |
|---|---|
 |
Take a photo of the screen. |
Scenarios(by clicking on  )
)
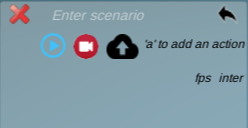 |
To add current time point, press "a" on your keyboard. User can choose the frames-per-second to be shown, starting from any selected time point and decide whether or not to interpolate in following global dataset movements. |
|---|---|
 |
Examples of added time points, using "a". |
|---|---|
 |
You can name your scenario and |
 play this scenario or
  record this scenario or
  save this scenario on MorphoNet database. Once saved on the MorphoNet database, you can share you scenario with other members/groups using
  . Use
. Use  to return to movie selection menu or
  to erase movie.
 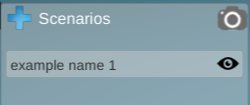 |
Now, if you go back to the movie selection menu, you can open previously saved scenarios. |
|---|---|
Rendering
 |
Background Color : Change the color of the background of the viewer. Lineage Background Color : Change the color of the background of the lineage viewer. Modify default material : Change the default color representation Modify selected material : Change the selection color representation Modify multi-colored material : Change the multicolor representation, between strips or stain. |
|---|---|
Figure axis
 |
Display customizable 3D axes. Use buttons K to displace the 3D axis and L to rotate. |
|---|---|
 |
Reset 3D axes to default values. |
 |
By checking/unchecking the box, the user can choose to show/hide each of the 3D axes. |
 |
For each end of the axes, the user can modify the text displayed via these text boxes. |
 |
The user can change the size of axes and text displayed via these scrollbars. |
 |
The user can change the colors of the 3D axes. |
Figure property
 |
Manage the display of text properties associated to the dataset. To be managed here, a "text" property must first be loaded and shown in the "properties" menu. Apply : display the text property of the selected object(s). Update : display the text property of a new list of selected object(s). Clear : Remove all the text(s) displayed. Select objects : select objects for which the text is already displayed. Full names : this button is dedicated to the ascidian embryonic cell names. It allows to switch between the Xn.[0-9,0-9,0-9,0-9]_/ format (e.g a7.0001_) to the Conklin format : Xn.p_/ (e.g A7.1_), more suitable for publication. Size : the 2 scrollbars allow to modify the size of the text and of the font. Text color : allow to modify the text color. Sister links : these buttons are also dedicated to ascidian embryonic cell names. It allow to Apply a line between selected sister-cells; to Update : by applying lines between a new list os selected sister cells or to Clear all lines linking sister cell pairs. Thickness : manage the thickness of the lines linking sister cells. |
|---|---|