The MorphoNet Standalone application can be installed on any recent operating system (Mac, Linux, Windows).
It combines in one single application the MorphoNet 3D viewer and a python environment containing plugins to perform 3D image curation.
Please report with the feedback tool any issues with the installation.
Download and installation
MorphoNet is a portable application:
- Download the application from : https://morphonet.org/downloads
You can either choose the stable version of a more recent one (with more features but which maybe be sometimes unstable)
-
Installation :
-
For Mac :
- Decompress MorphoNet.zip archive
- Move the "MorphoNet" application into the "Applications" folder
-
For Windows :
- Decompress the MorphoNet.zip archive. To start MorphoNet, launch "MorphoNet.exe"
-
For Linux :
- Decompress the MorphoNet.zip archive. To start MorphoNet, launch "MorphoNet"
-
-
And finally launch the software
- In case you have such a message "MorphoNet is an app downloaded from the Internet. Do you really want to open it?", please accept it.
Viewing Datasets on MorphoNet
Upon arriving on the main page, you will be presented with the list of public datasets on the MorphoNet servers. You can use the scroll bar to browse the list.
(Optional) Log to with a MorphoNet account: If you want to upload or get access to your datasets or shared datasets, you will have to login to the application with your MorphoNet account.
* To create an account, click on the top-right button on the web page, click on the signup link and follow the instructions.
* click on  and input your credentials to login with your account.
To view a dataset on MorphoNet, simply click on the eye button  and the selected dataset will be loaded in MorphpoNet.
You can select the first and last time step you want to view with the slider on the left, if you do not wish to load the whole dataset.
For more information on how to use MorphoNet when viewing a dataset, please refer to this page
Filters
You can filter the list of dataset using the following tools. Note that these filters can be used together.
| Filter: | Function: |
|---|---|
 |
Using the top bar, you can search datasets by name. the search is not case-sensitive. |
 |
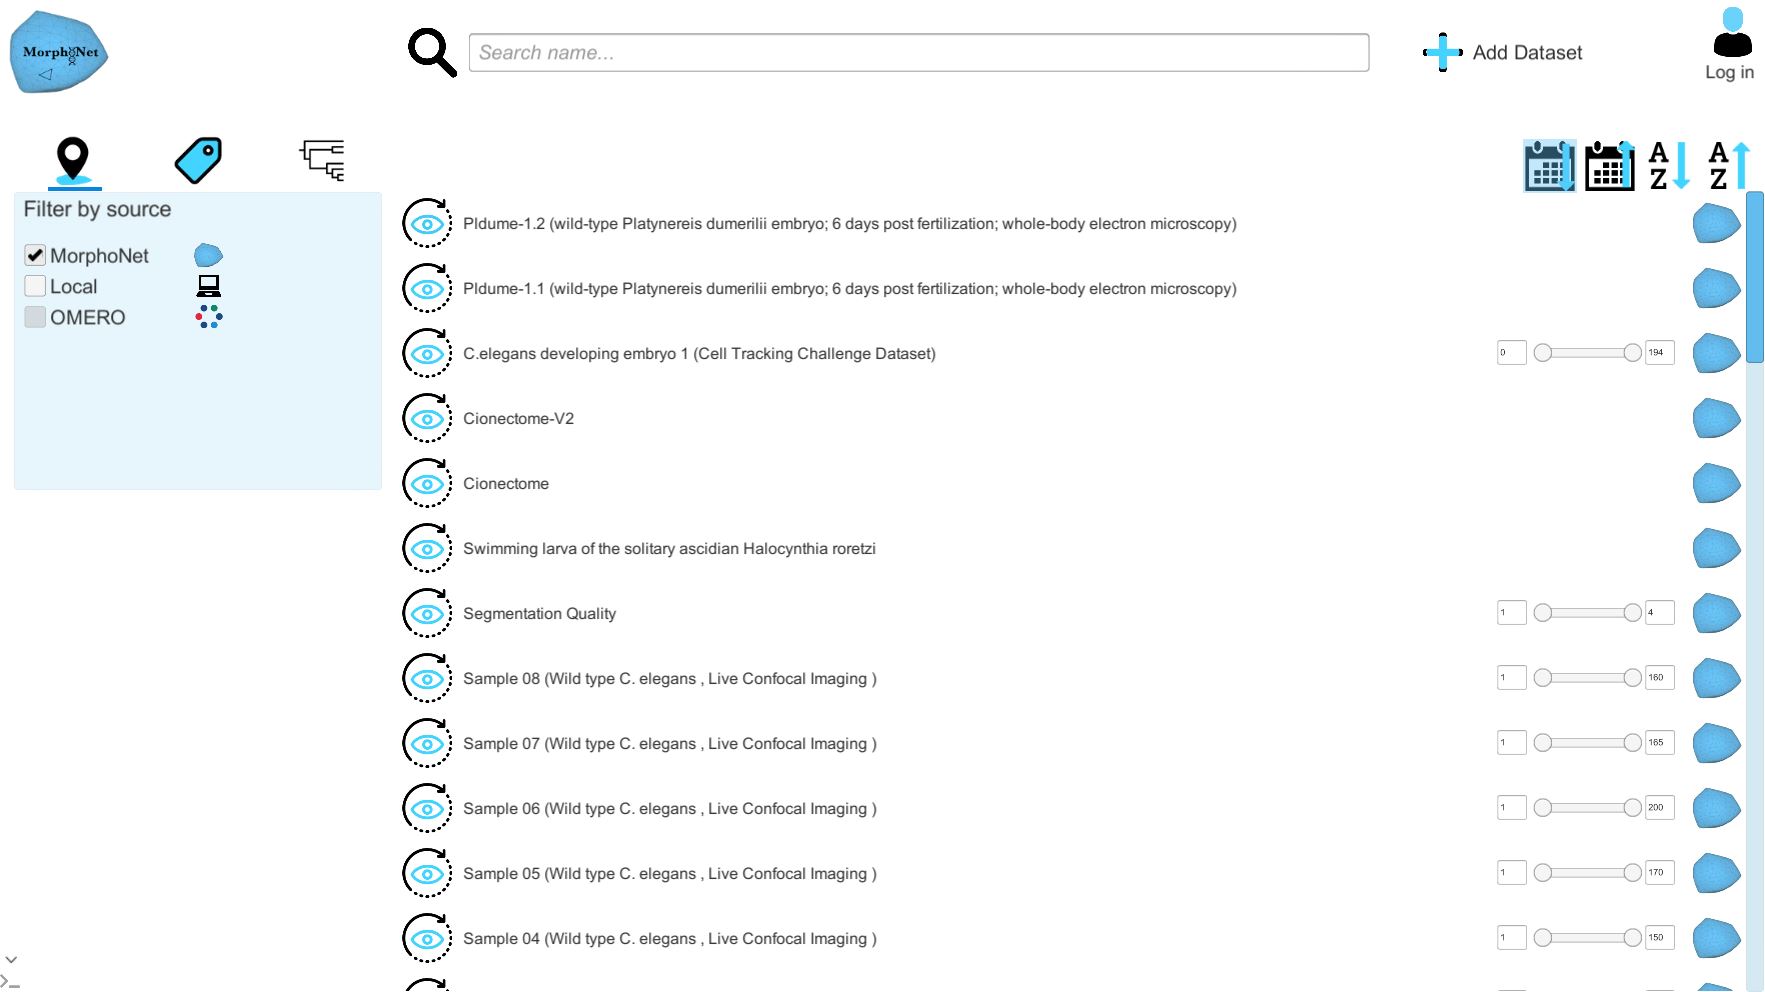
Using the 4 buttons on the top left of the list of datasets, you can (from left to right):
|
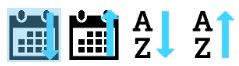
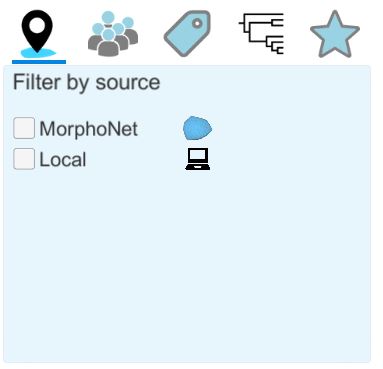
Using the menu on the left, you can apply more advanced filters. Note that the menu has more options when logged in. From left to right, the buttons do:
| Filter: | Function: |
|---|---|
 |
Filter by source: Using this submenu, you can filter the datasets that are online (MorphoNet) from those on your computer (Local; to see how to create local datasets, please refer to the add a new local dataset below). |
 |
Filter by groups: this option is available only when logged in. It allows you to filter datasets that belong in a certain group (within the groups you are a part of). |
 |
Filter by tags: this option allows you to filter datasets with a certain tag. the list of tags is expanded if you are logged in and have created tags |
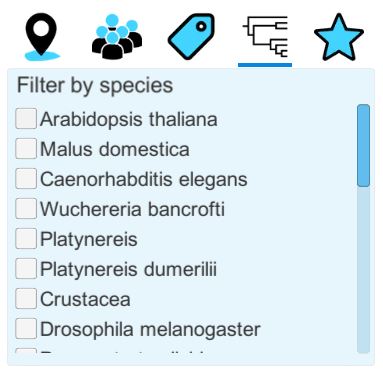 |
Filter by species: this filter allows you to filter the dataset by species. |
 |
Filter by favorites: this option is only available when logged in, and it allows you to filter the datasets which you have set as your favorites. This can be done on the website by being logged in and clicking on the little star icon next to a dataset. |
Add a new local dataset
If you want to visualize your local dataset, or even curate it, you first have to add it in the application.
Warning: When creating a dataset that is a time series, we reccommend that the dimensions of all the images in your series is identical. To speed dataset creation up, when selecting a floder containing a time series, MorphoNet looks at the first image and expect the whole series to have the same dimensions and voxel size. If you input a time series with different dimensions, you will have some displacement between meshes and intensity images, and between time steps.
-
Add a standard dataset
- click on
 at the top right.
 - This window will open:
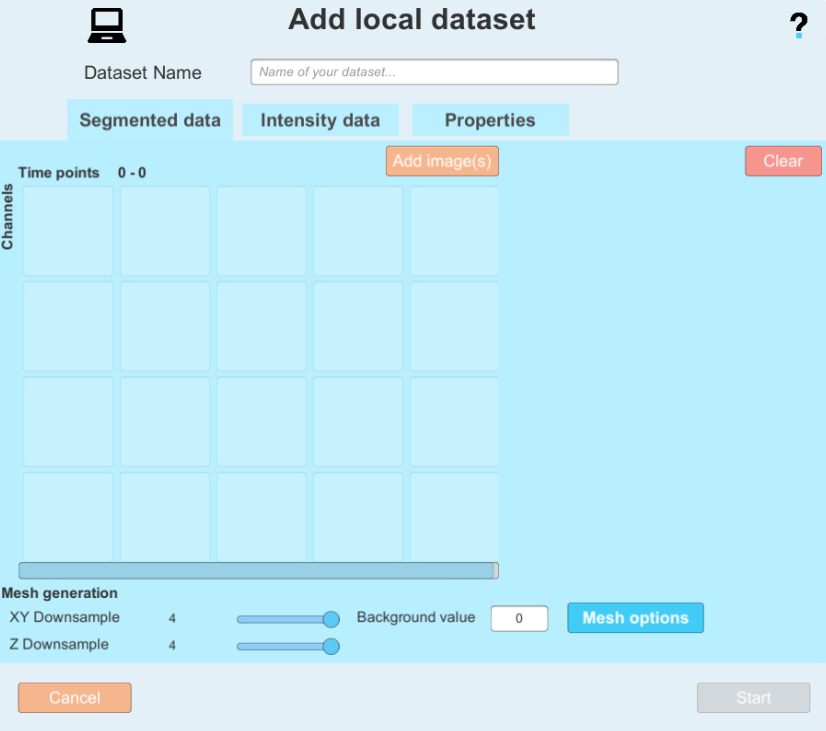
- By clicking on:
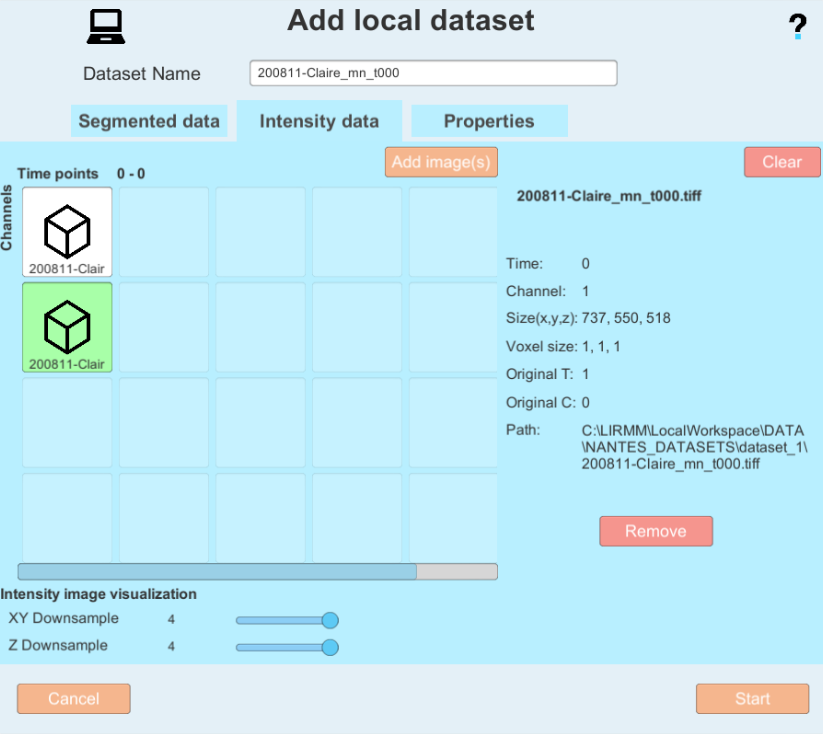
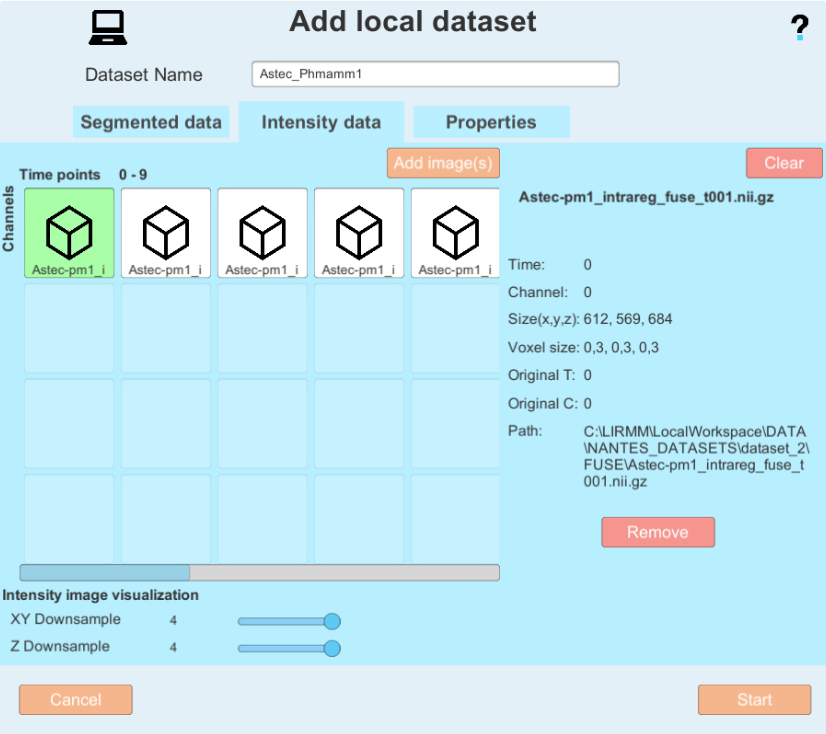
 you can add images to the dataset. Please note on which tab you currently are (Segmented data or Intensity data).
 - Enter the paths 1) to the folder containing the segmentation images when adding images to the Segmented data tab 2) to the folder containing the membrane intensity images when adding images to the Intensity data. You can select a folder to automatically select all files within that have the same name format (e.g. prefix and time step) or select a single file.
- Picking segmented images :
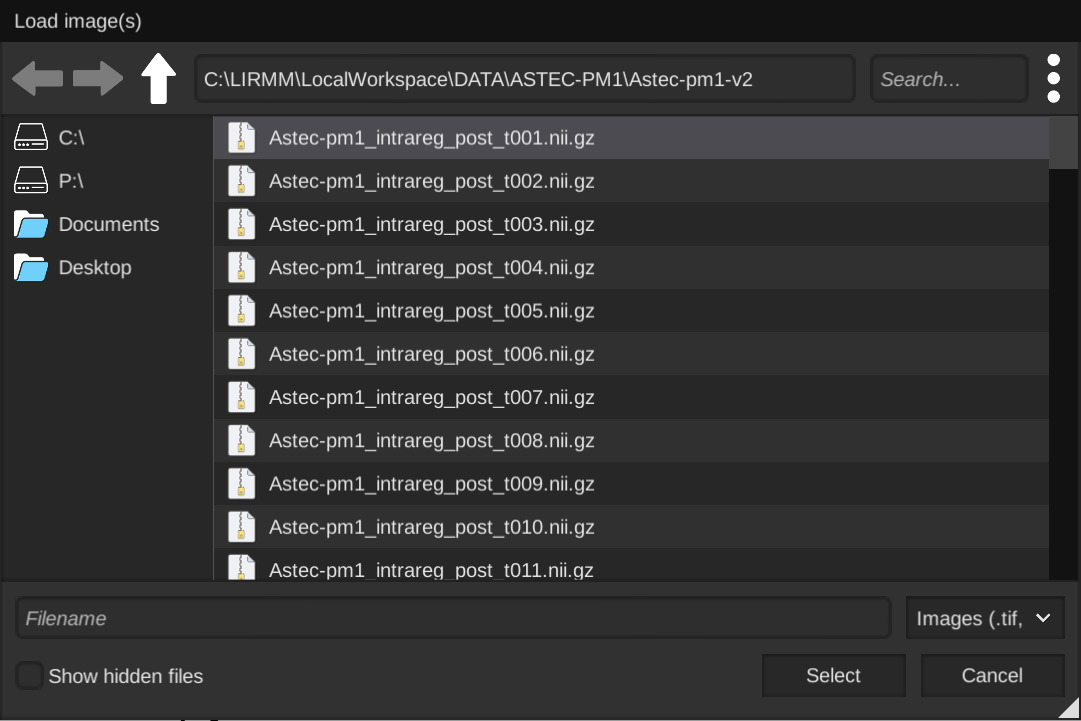
- Picking segmented images :
-
After selecting one or several images, you will be shown the image(s) metadata, and will have the possibility of changing it or fix it if it has been improperly saved or could not be read. Pay special attention to the dimensions order menu, as you need to make sure the dimensions X,Y,Z C (channels) and T (time) are matching your image(s). You can also add a time offest to start your image series at a later time point (this can be useful if your time series starts at a time later than 0 with the file names)
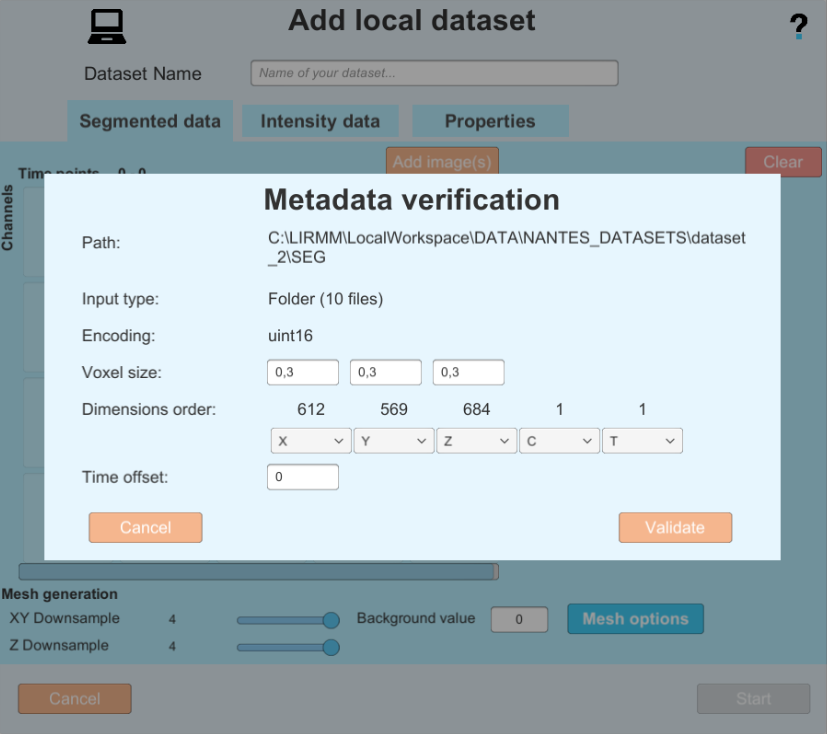
- In this example the Metadata is good, so you can proceed by clicking on the validate button. but in the following example you can see an image with bad metadata, and the same image with metadata completed by the user.
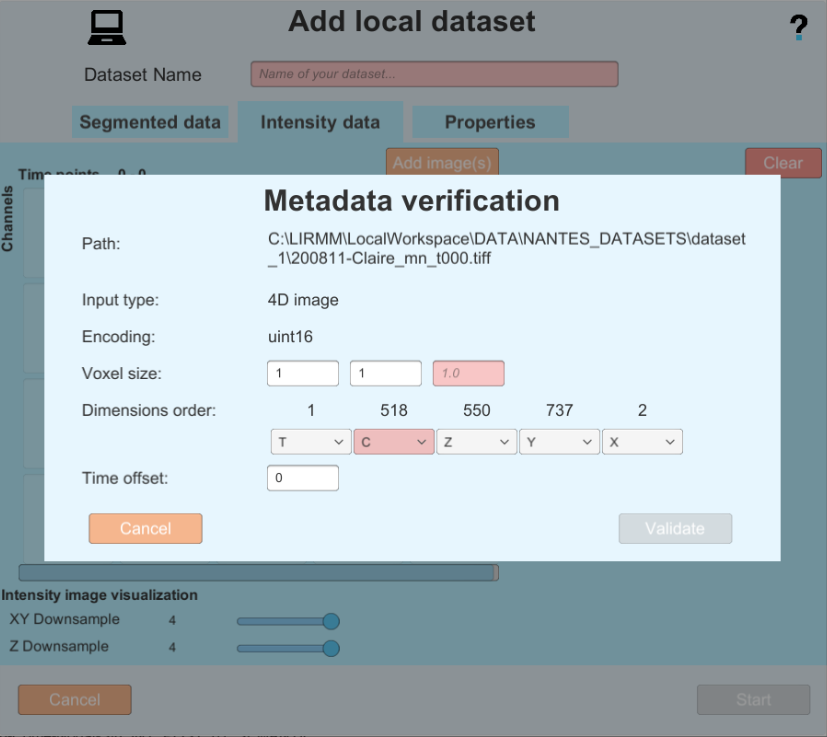
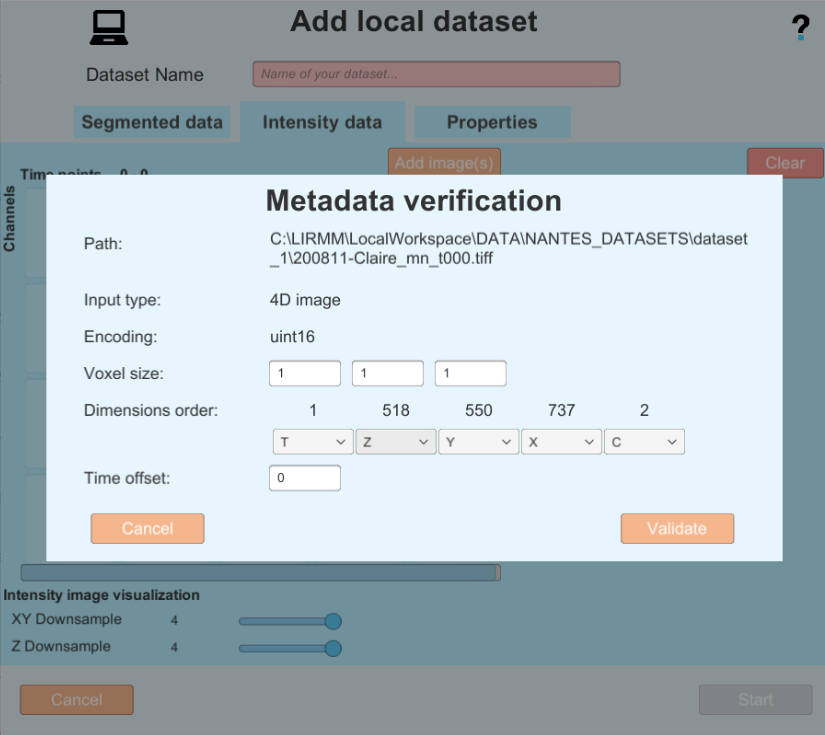
- In this example the Metadata is good, so you can proceed by clicking on the validate button. but in the following example you can see an image with bad metadata, and the same image with metadata completed by the user.
-
After having validated your images, you will notice a cube for each 3D image added.
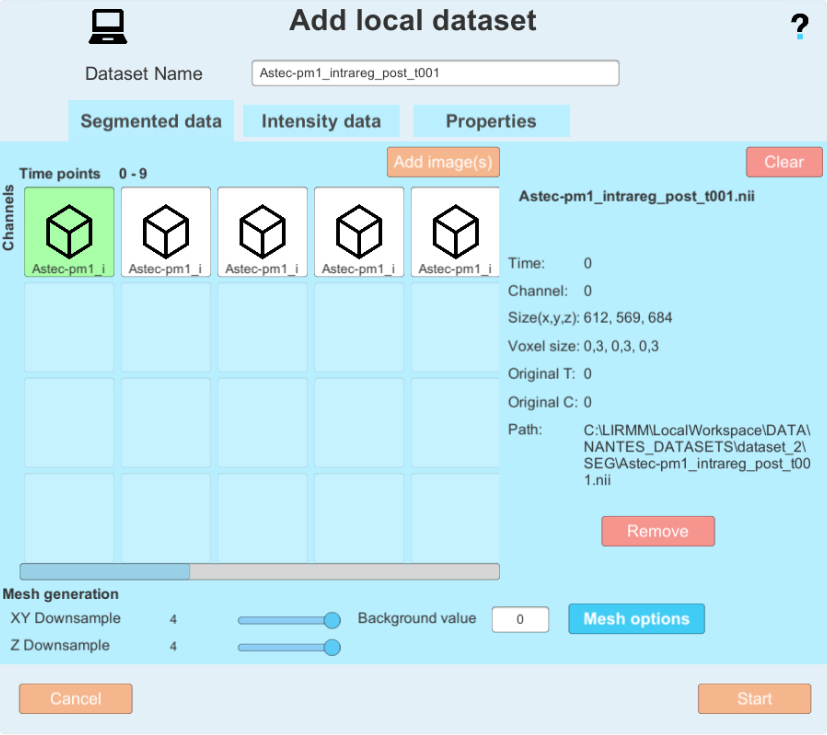 Clicking on a image shows you its parameters, and you can move them on the grid by dragging and dropping them. on the grid, the horizontal axis represents time, and the vertical axis represents the channel. For instance, by adding a 2-channel image, you would have a result like this :
-
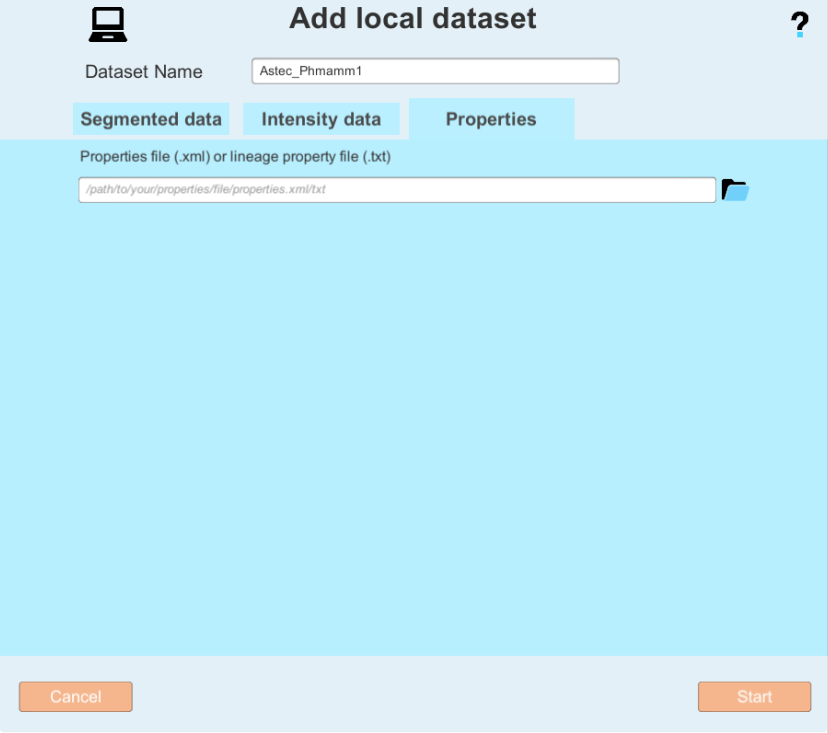
If you also have an XML property file (The XML file is described in the astec package) you can add it in the Properties tab
- A dataset name based on the file names (segmented images or raw images) is automatically generated and can be manually edited.
- Set your background label (usually 0)
- "Downsample" reduces the quality of meshes to increase processing speed. Here are recommended downsamples depending on the size of the input images: resolution 0.3 = downsample 4; resolution 0.4 = downsample 2; resolution 0.6 = downsample 2. Set a downsample for the XY and Z axis of the images with the corresponding sliders, and make sure to set it for the Segmented data tab as well as the intensity image tab.
- At the end of the configuration, you get a window like this one:
 and you can now click on the "Create" button.
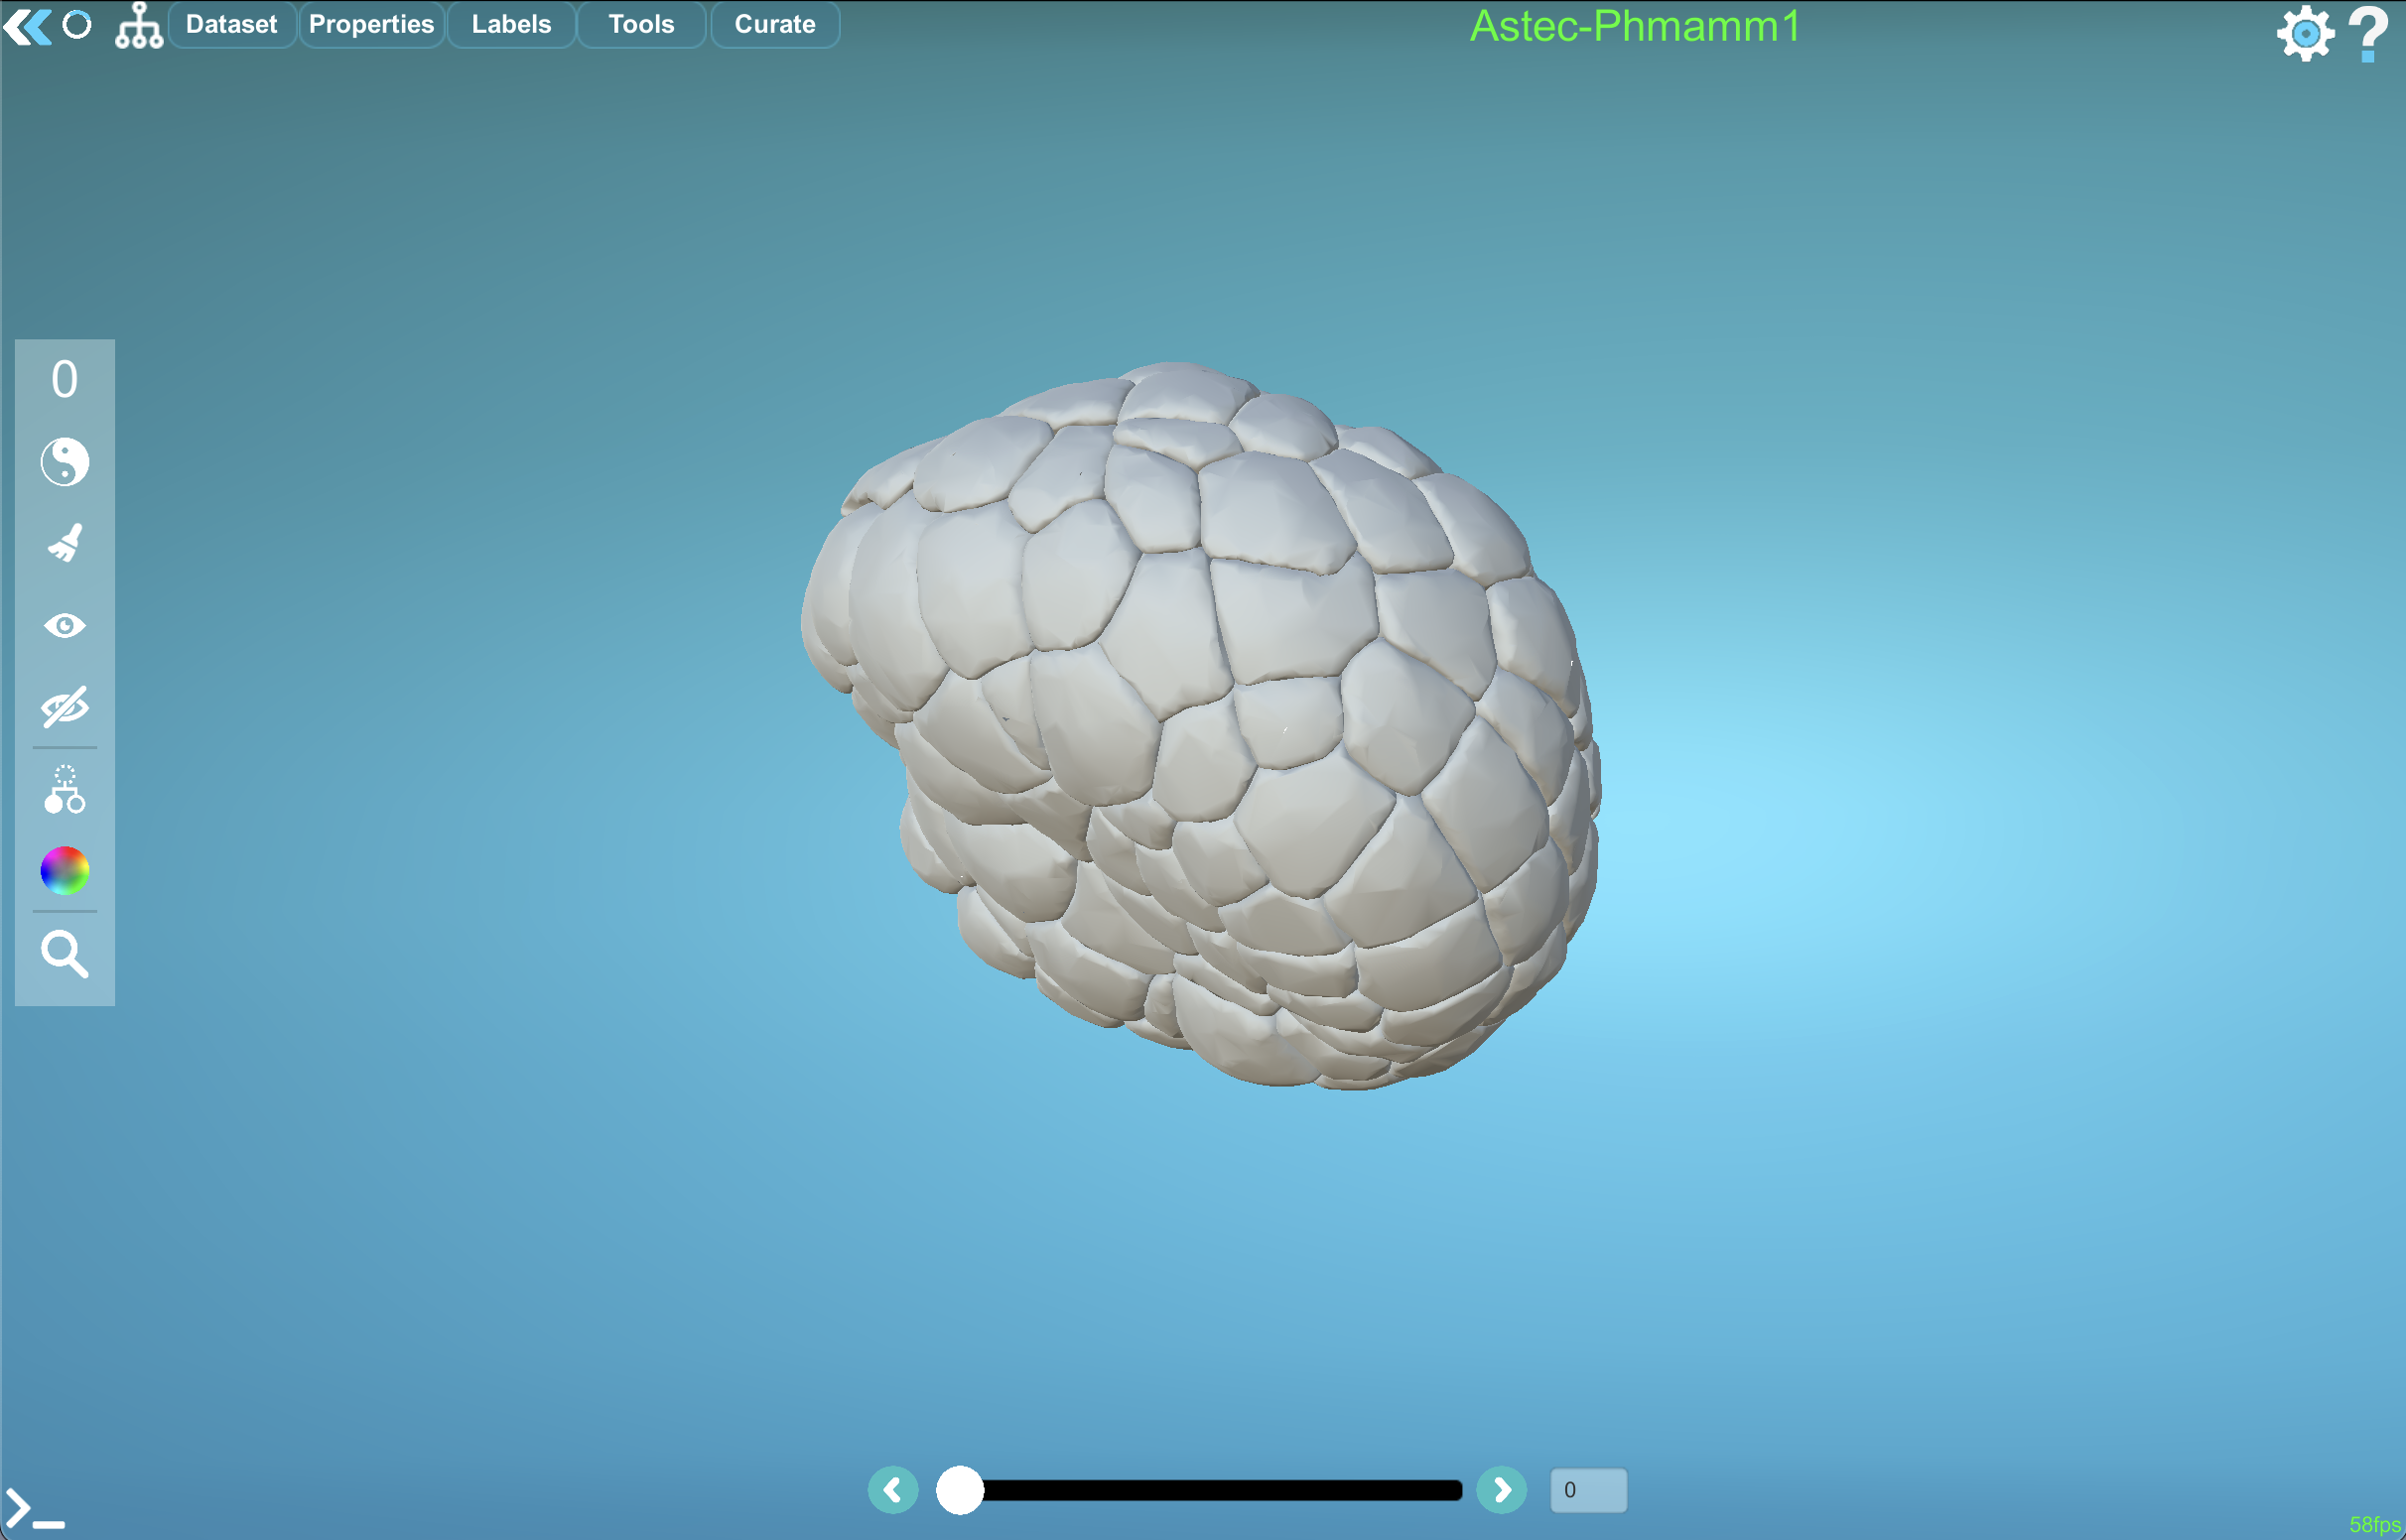
 - The MorphoNet viewer opens and the segmentations are converted into meshes and displayed. This operation may take some time depending on the number of objects and the number of time points.
- click on
The first time a dataset is loaded on MorphoNet after the creation, it may take a longer time to fully load. Please be patient as files are created for your local dataset in order to load it quickly the next times you will open the dataset.
If you want to curate a dataset you've created, please refer to the curation help page.
For more details on how the advanced menu impacts the resulting generated datasets, please refer to the Advanced parameters part at the end of this page.
Managing local datasets
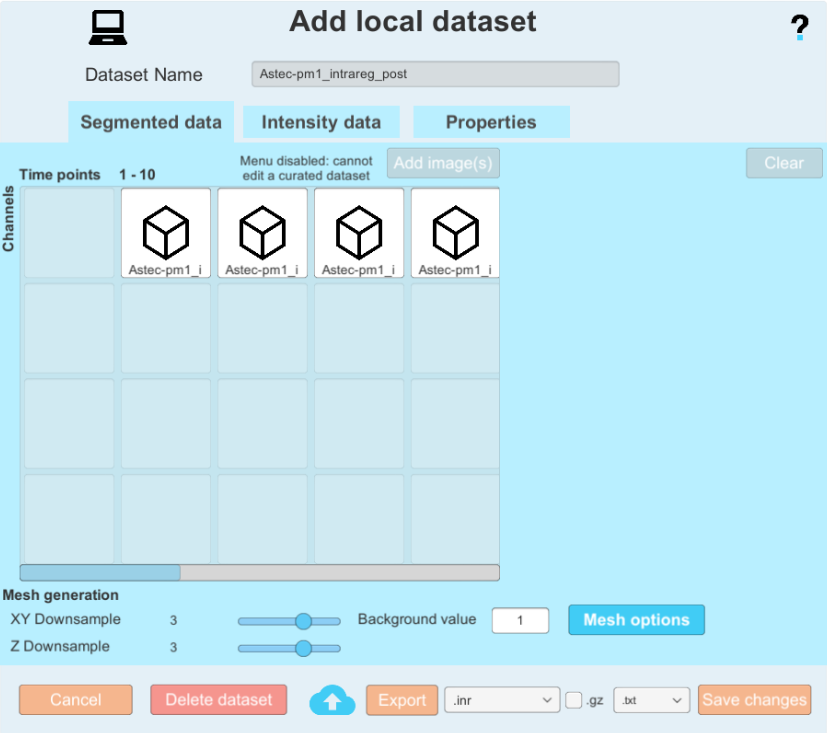
By clicking on the wheel icon next to your local datasets, you can go into the options menu. Here, there are several things you can do:
-
You can change some elements about the dataset. you can change the raw images associated the same way you do when you create a dataset, you can change the default time steps, you can change the background value of your segmented imaegs, the downsample factor, and the advanced parameters. Please note that any change that will impact the generated meshes (downsample factor, background label, advanced parameters) will force a recomputation of the meshes (more on that later). You can also change the segmented data, as long as you have not curated your dataset (applied at least one curation plugin) You will notice that the segmented data is greyed out and cannot be modified if your dataset is curated.
-
by clicking on the delete dataset button
 you can delete the dataset. this will not delete the data that was used to create it, only the temporary files created by morphonet.
 -
by clicking on the cloud button
 you will open the upload menu. this will allow you to upload your local dataset on MorphoNet if you wish (it will be private by default). More on this menu in the Upload a dataset part down below.
 -
The export menu and options
 Allow you to export your dataset as images and properties. use the dropdown and checkbox to select your images format and select a folder after clicking on the export button to export your dataset. This should be done once your curation process is completed, to get your final modified images.
Upload a dataset to MorphoNet
Clicking on the upload button in the option menu of your local datasets allows you to upload dataset to MorphoNet, if you are connected with your account. All of the datasets you upload will be private by default, and accessible only by you (a property you can later modifiy using the dataset page of the morphonet website). Set the name of your dataset and press upload to upload it. You need to be logged in to do this.
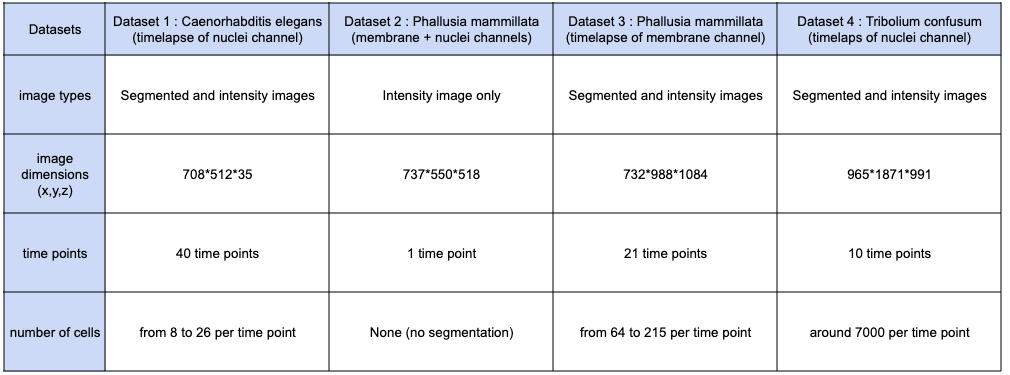
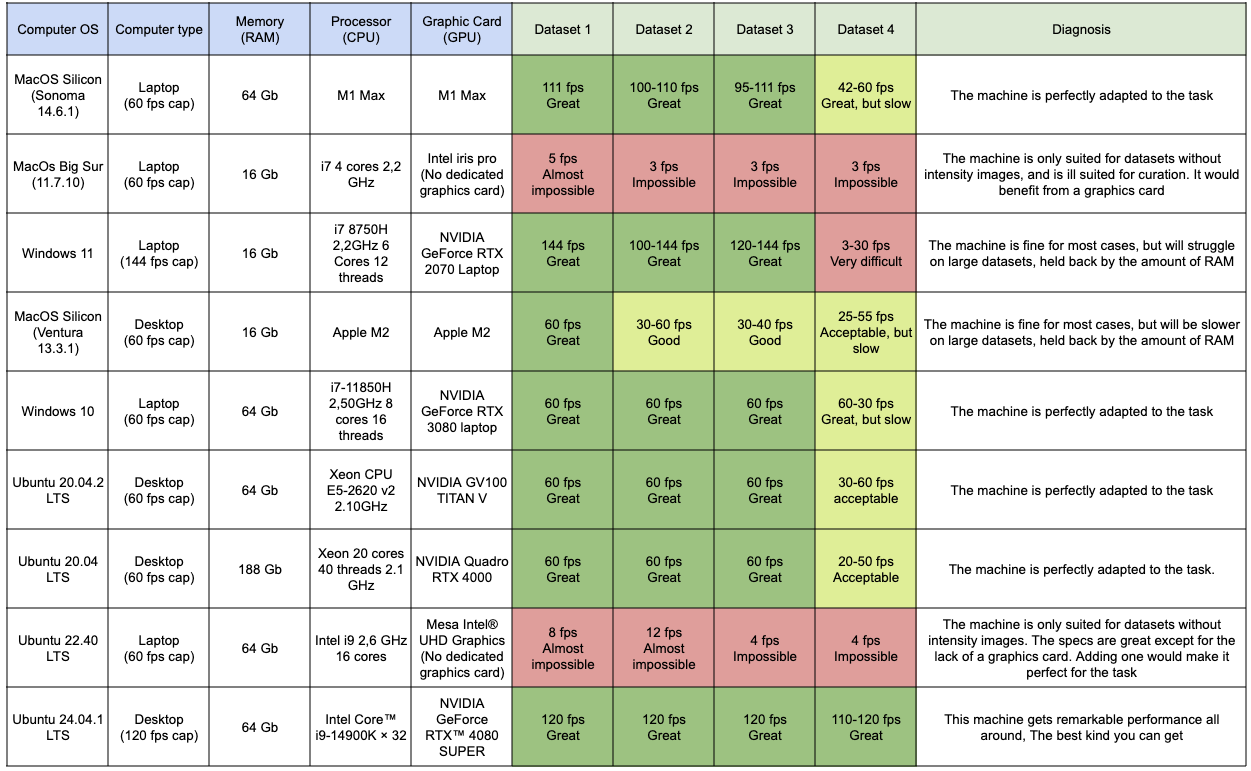
Application performance
In the two following tabs, you will have a recap of the datasets that were used to benchmark the performances of MorphoNet, as well as the performances on these datasets, using different machines. This way you can see what kind of performance to expect, depending on the type of machine you have, and the task you wish to do.
Dataset description
Performance on different machines
If you need help to change your dataset parameters, please refer to : Dataset advanced parameters