You can find 2 example datasets https://seafile.lirmm.fr/f/9fe0fd79c5b34f2dbdc0/?dl=1
Prerequisites
- You need on your computer or external hard drive: i) segmentation images after post-correction and spatial registration; ii) fusion images of the corresponding membrane signals after spatial registration; iii) the xml file containing lineage information.
- Install the MorphoNet application and load your dataset on the MorphoNet application (for more details, please visit: https://morphonet.org/help/application/index.html).
- Note: when adding your local ascidian embryo dataset, set the background to 1.
Curation
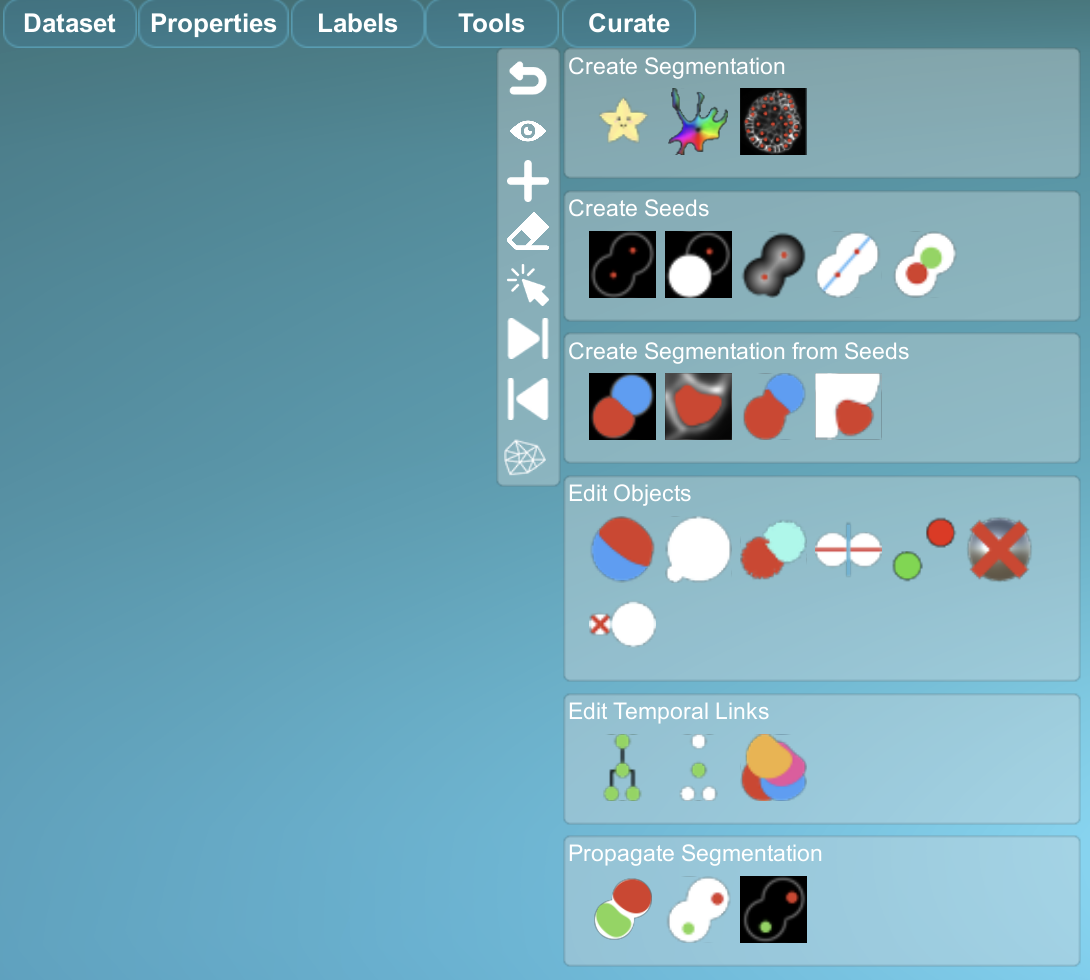
- The plugins used to correct the 3D+t datasets of reconstructed ascidian embryos are in the 'Curate' menu.
.
- For more details on the Curate menu, buttons and how the plugins operate, visit this page: https://morphonet.org/help/curations/#curatemenu.
Step1 : Lineage visualisation
- Open the lineage window to check the integrity of the lineage and take the opportunity to view it and get an idea of the number of different segmentation errors that need to be corrected.
- Here is an example showing errors detected on a portion of a lineage tree, with probable over-segmentation on the left (successive divisions too close together) and a cell on the right that was not segmented at the last time step:

Step2: Process any object below a certain size using the "Deli" plugin
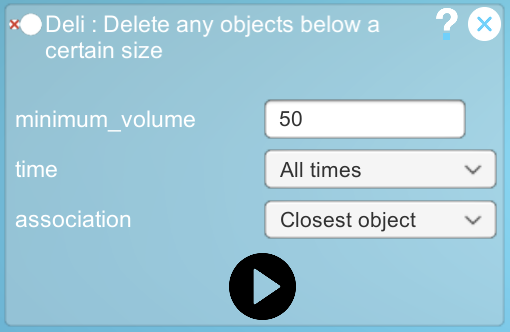
- To do this, we need to determine a threshold value below which the objects will be processed by the Deli plugin.
- To know the volume of the cells, load the 'area' property calculated by MorphoNet (available within the "Properties" menu in the "Number" sub-menu).
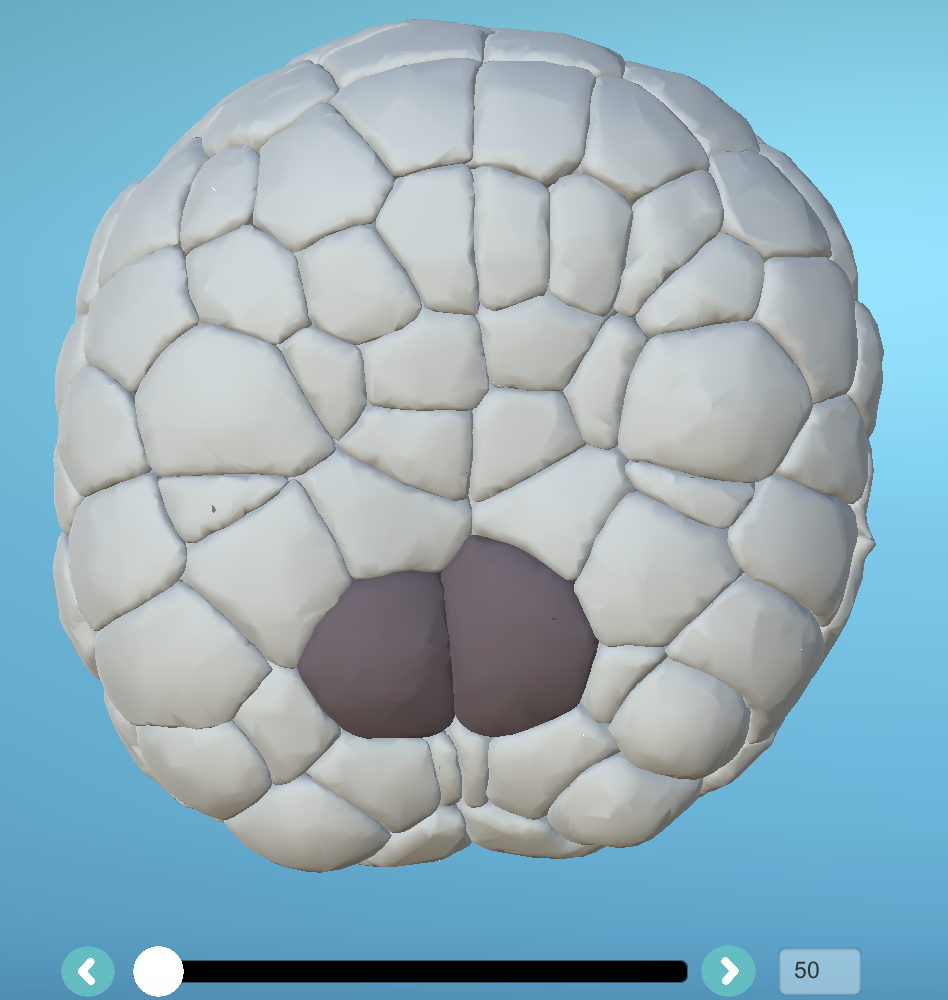
- Go to the last time step of your dataset and apply a colormap to the smallest volumes of the real visible cells. Then use the scatter view if necessary to find the smallest true cell in the dataset.
- Make a note of this volume and in the Deli plugin define a threshold volume based on it.
- Choose to apply the plugin to all the time steps and run it.
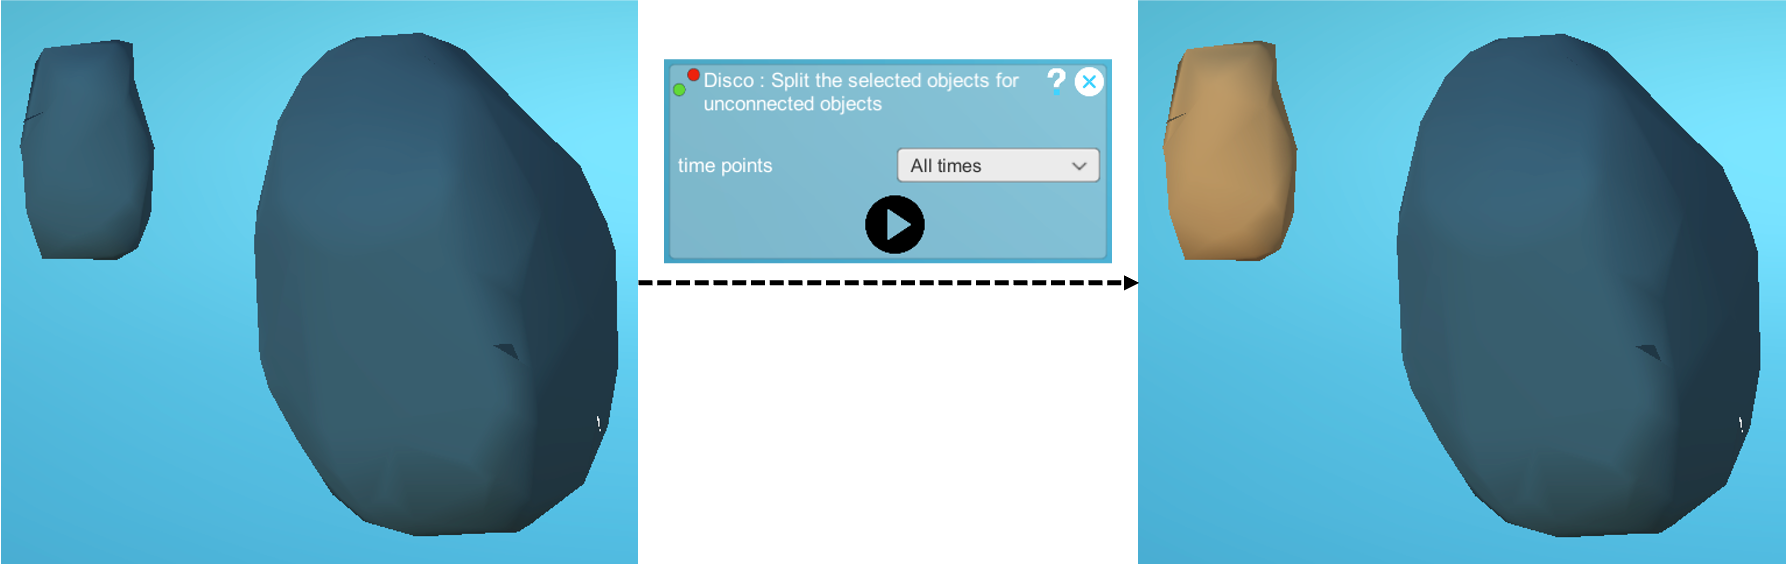
Step3: Correction of cells merged with an unconnected part of another cell
Within the segmentation, one can find cases of objects that contain a cell fused with an unconnected piece of another cell.
-
To deal with this type of segmentation error, run the 'Disco' plugin on all the time steps in your dataset. This operation can take some time, depending on the size of your dataset and the number of objects in it.
-
Below is an example of a cell that was initially merged with an unconnected part of another cell. The cell and the unconnected part of another cell are separated into two distinct objects after running the Disco plugin:
Step4: Create empty labelling
-
To do this, go to the "Properties" menu and click on:

-
Then create the following labels:
- During curation, for example, you can assign the label 1 to corrected cells and 2 to cells currently being curated.
Step5: Correction of bilaterally symmetric cell lineages from the first time step
-
Select two symmetrical cells at the first time step of your reconstructed embryo to be corrected and apply label 2 to them (=cells in curation):
-
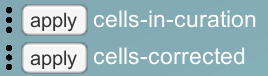
Save the "cells-in-curation" labelling.
-
Hide all the other cells:

-
Next, remove label 2 from the two symmetrical cells in the first time step so that no curation plugin is applied to it.
- Using this configuration, we will correct all the progeny of these two symmetrical cells using the "go to the next potential error" button, which allows you to review one by one, in temporal order, all the moments of cell division as well as premature cell death events (there is no cell death during ascidian embryogenesis):
 .
. - Once on the selected object: 1) visually identify the symmetrical cell and then 2) move backwards and forwards a few time steps in search of potential segmentation errors (examples of segmentation errors detected using this method and the plugins used to make the corrections below).
When you have finished correcting all the lineage from the two symmetrical cells chosen: * Return to the first time step in your dataset. * Remove label 2 from the two cells. * Apply the "corrected cells" labeling. * Apply label 1 to your two cells. * Save the "cells-corrected" labeling. * Suspend the display of the "corrected-cells" labeling. * Display the whole embryo. * Choose two new symmetrical cells. * Hide all the other cells. * Apply label 2 to the two selected cells. * Save the "cells-in-correction" labeling. * Restart searching for and correcting segmentation errors using the "go to the next potential error" button.
Here are some examples of segmentation errors detected using this method and the plugins used to make the corrections:
Over-segmented cell
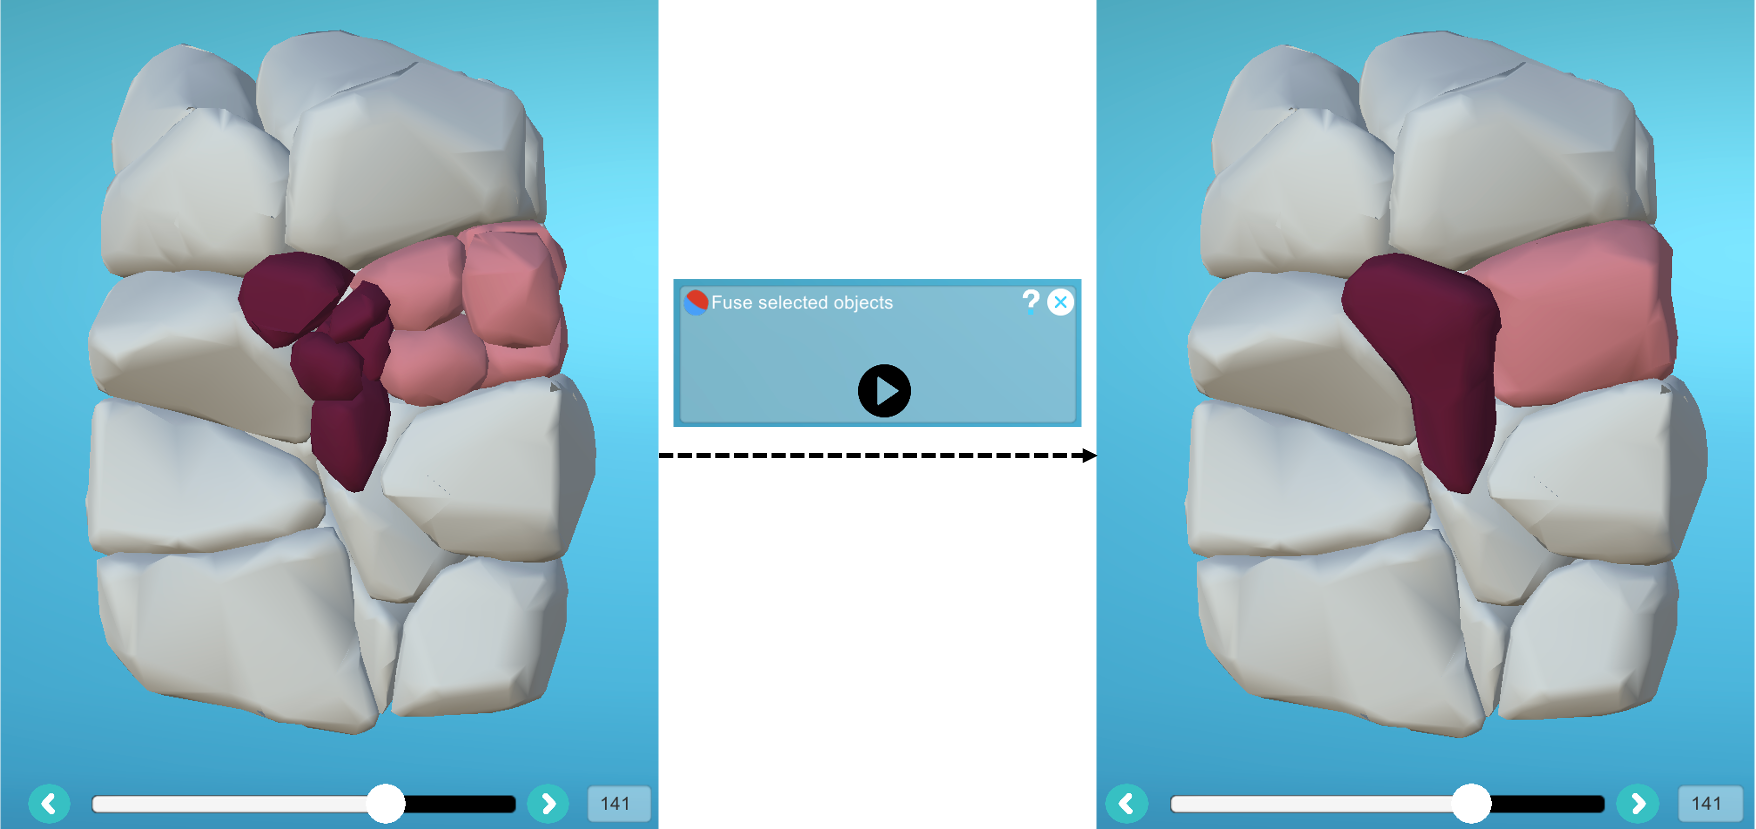
- Apply the same label to the objects belonging to the same cell, then run the "Fuse" plugin:

Segmentation of the extra embryonic medium
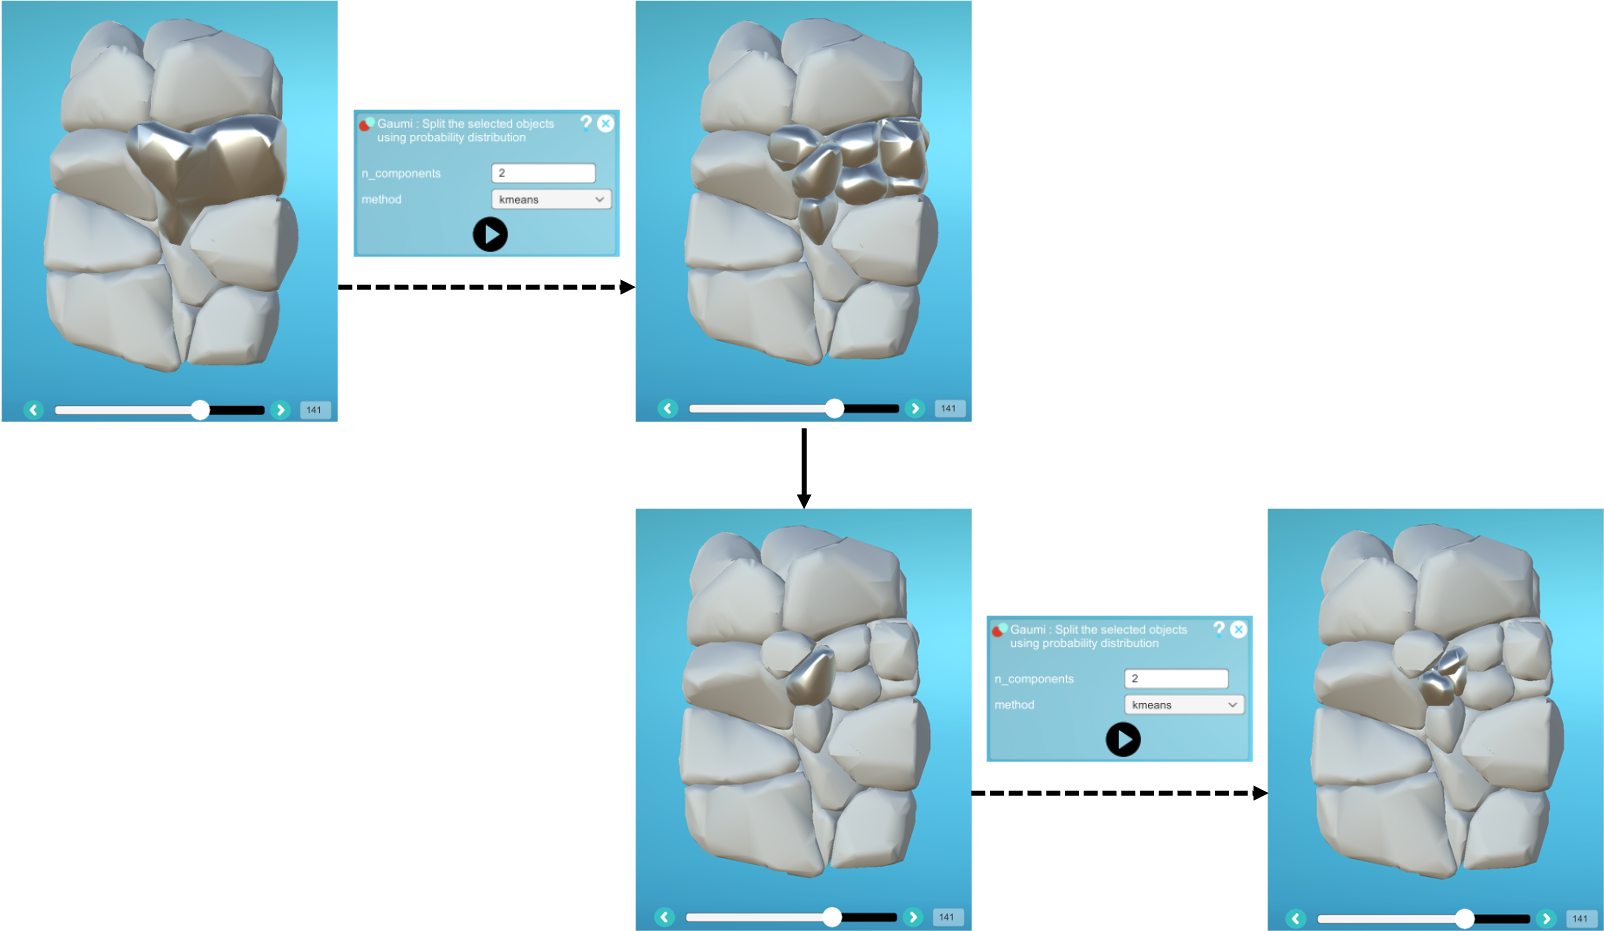
- 1) Separate the cell from the intra-embryonic environment at one timepoint using the "Gaumi" plugin, which will split the selected objects using probability distribution. You can use this plugin iteratively, adjusting the number of objects created to achieve the target result:
- 2) Then apply the same label to the pieces belonging to the cell and another to the pieces belonging to the embryonic medium, then launch the "Fuse" plugin:
- 3) Remove all the labels.
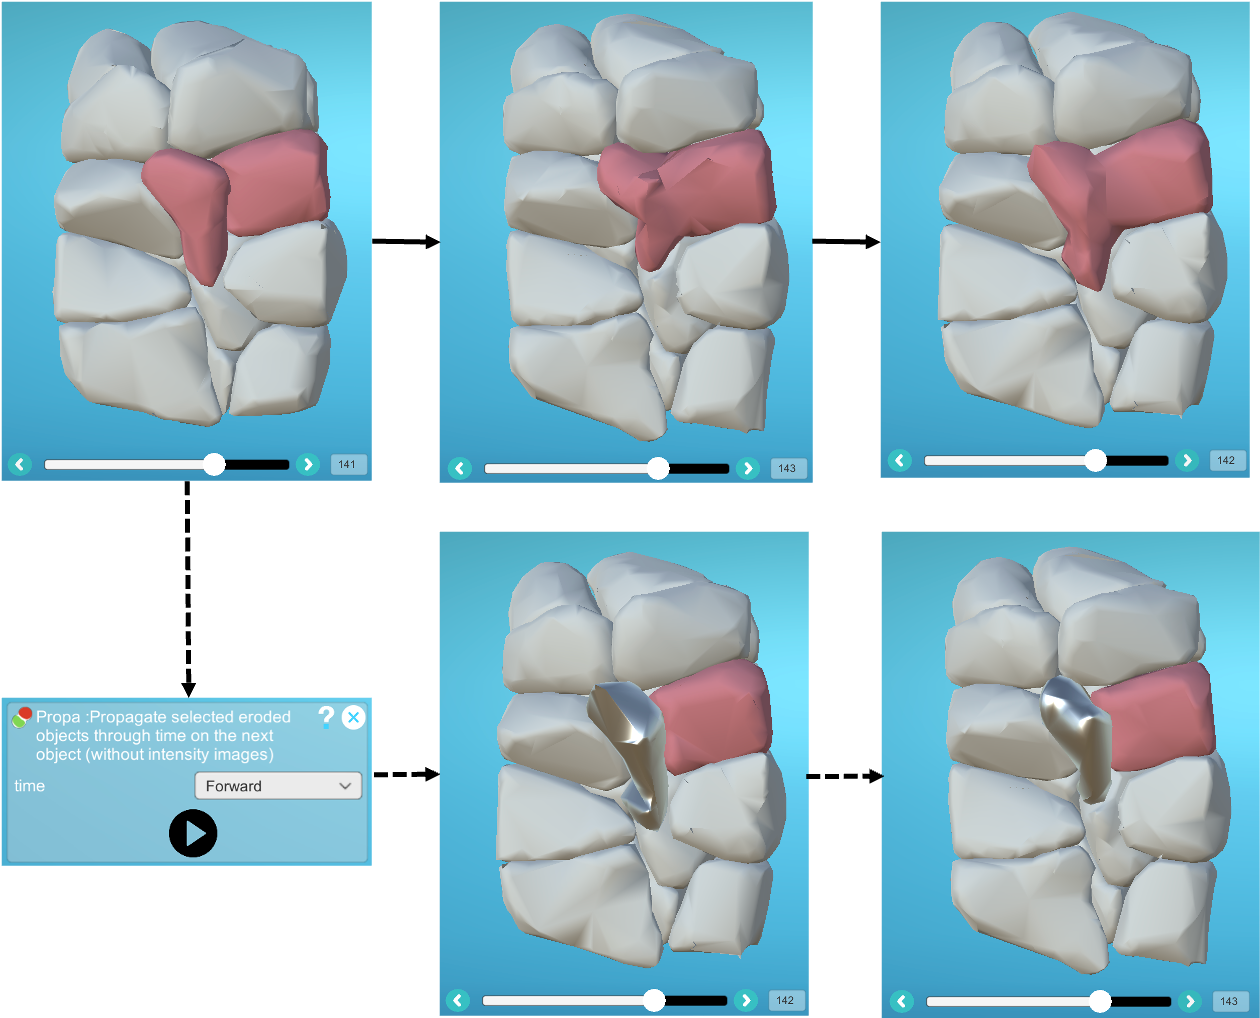
- 4) Now apply the same label to the cell and the intra-embryonic piece, as well as to the objects we want to split using the two objects we've just created, then launch the "Propa" plugin:
- 5) Remove all the labels.
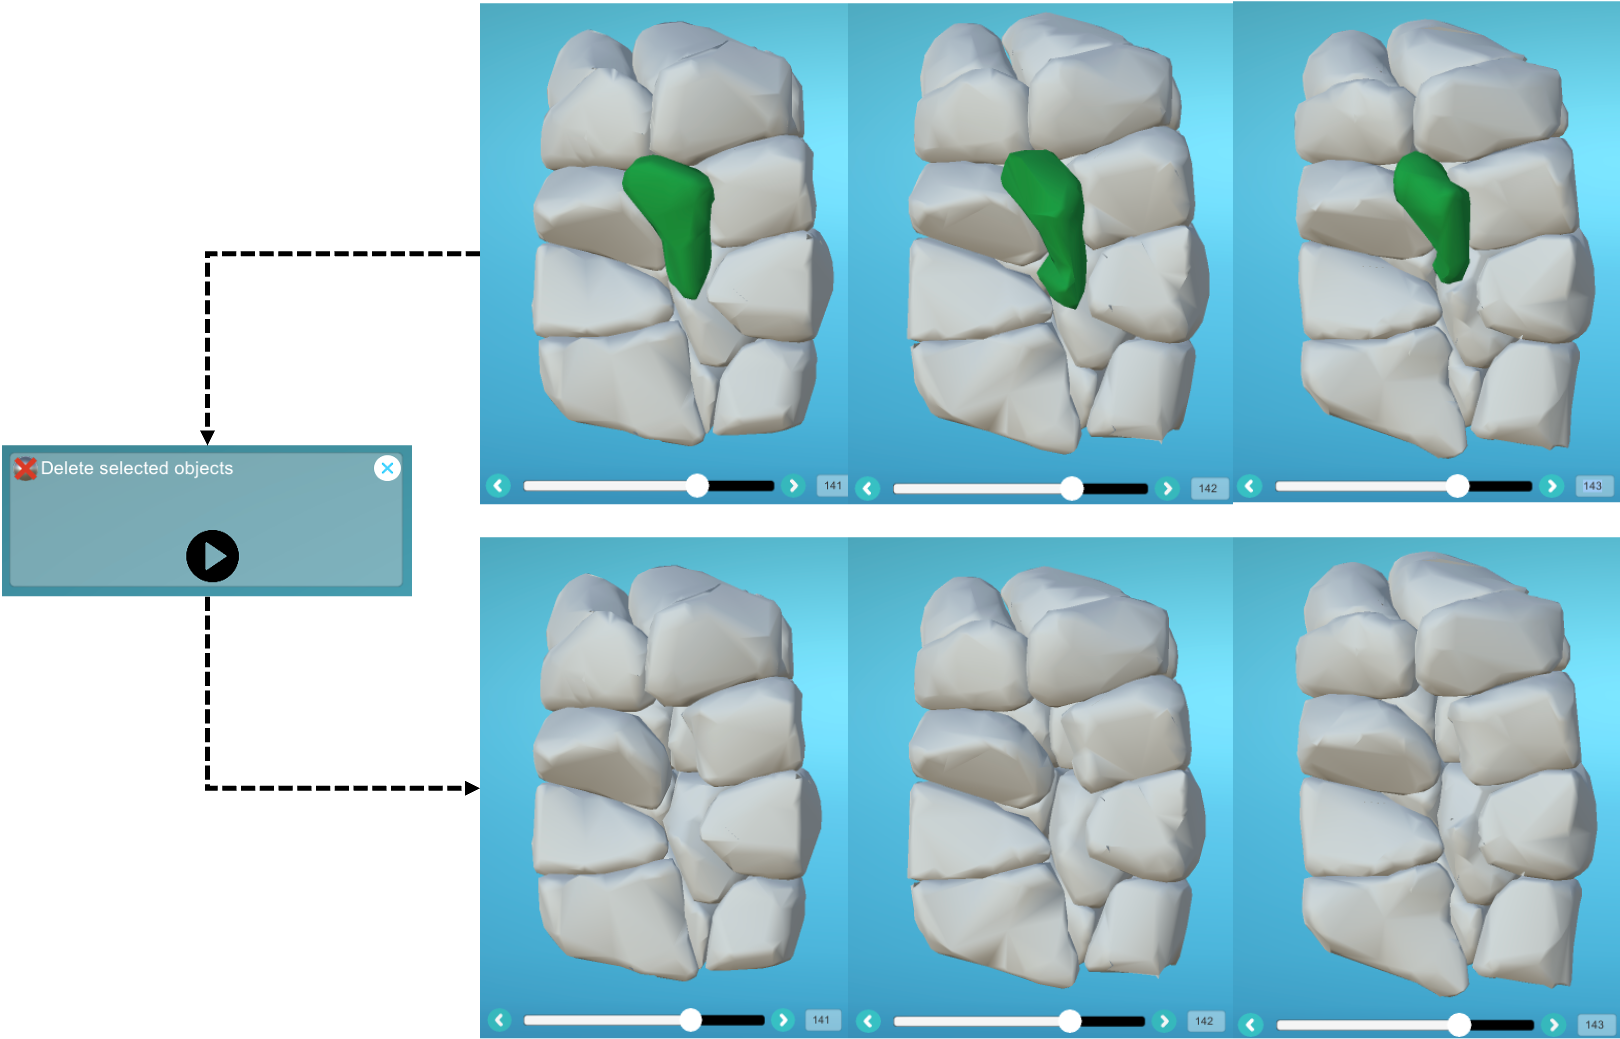
- 4) Finally, apply a label to the intra-embryonic chunks across the different time steps, then run the "Delete" plugin to remove them:
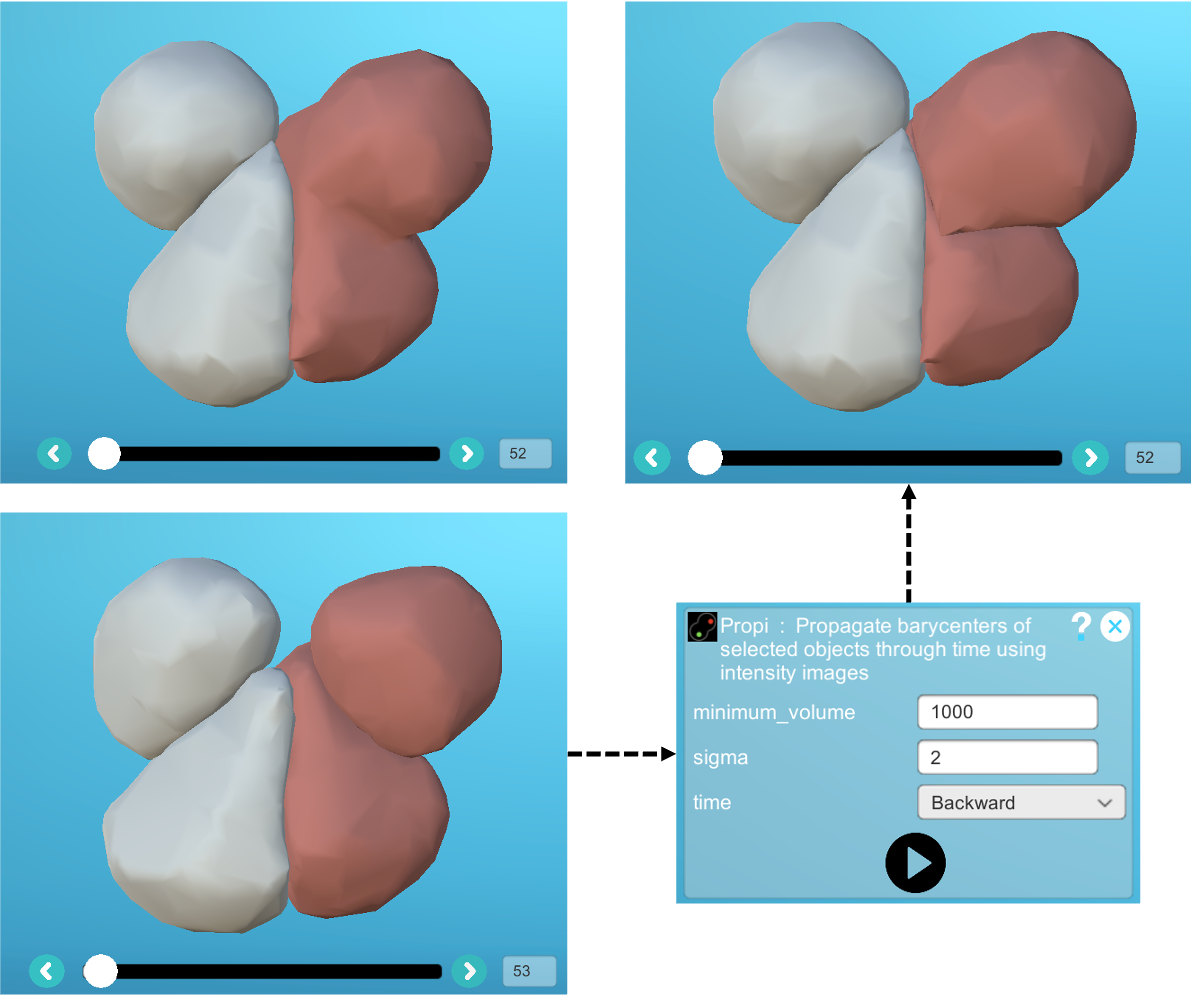
Missed division
- Apply the same label to the cell at the time of the missed division and to the two corresponding divided cells at the next time step, which will be used differently depending on the plugins used afterwards.
-
It is recommended that you first use the "Propi" plugin, which will try to separate the two cells using information from the membrane intensity image:
-
If you have difficulty recreating the two objects with 'Propi', you can then test 'Propa' and then 'Propro'. However, these plugins should be used with caution because, as they do not use membrane intensity images, they can lead to the false separation of an undivided cell into pieces.